Iyengar Yoga: Props, Alignment and Precision Without Force
Retiru Team
The Retiru content team — yoga, meditation and ayurveda.
Introduction
Iyengar yoga is often described as precise, technical and detail-oriented. That is true, but it should not be confused with stiffness or with forcing the body into an ideal shape. In this method, a posture is built step by step so the practitioner can understand support, direction, muscular action and unnecessary tension. Props such as blocks, belts, blankets, chairs, bolsters and the wall are not signs of weakness. They are practical tools that create space, stability and clarity.
A useful way to understand Iyengar is this: alignment is not force. A good pose is not always the deepest or most impressive one. It is the pose in which the breath can remain steady, the joints feel organized and the mind can pay attention without struggle. This makes the method valuable for beginners, people with limited mobility, experienced practitioners who want to refine technique and anyone coming from faster styles who needs to slow down and observe.
This guide explains what makes Iyengar yoga different, which benefits are realistic, what its limits are, how to practise a simple sequence and which mistakes are common at the beginning. It is not a substitute for working with a qualified teacher, especially if you have injuries or medical conditions, but it can help you practise with more intelligence and less strain.
What this style is and how it differs
Iyengar yoga is named after B.K.S. Iyengar, one of the most influential teachers in modern postural yoga. The method is based on three recognizable principles: precision, alignment and sequencing. Precision means paying attention to specific actions within a pose: how the feet are placed, where the thighs rotate, how the spine lengthens and where the weight is distributed. Alignment is not about creating a perfect-looking body shape. It is about organizing the body so that effort is efficient and compensations are reduced.
Sequencing is equally important. In an Iyengar class, poses are rarely thrown together at random. The body is prepared progressively: first by establishing support, then by introducing more complex actions, and finally by integrating the work through quieter or restorative postures. This gradual approach helps the nervous system experience practice as learning rather than as a fight.
Props are the most visible feature of the method. A belt can help lengthen the leg without rounding the back. A block can bring the floor closer so the chest stays open. A chair can support a backbend without compressing the lower back. A folded blanket can protect the neck or lift the pelvis. Far from making practice less serious, props often make it more precise because they remove unnecessary struggle.
Compared with dynamic styles such as vinyasa, Iyengar is usually slower and more analytical. Compared with purely restorative yoga, it can be more active and demanding. Instead of flowing quickly from one shape to another, the practitioner enters, adjusts, stays, observes and exits with control.
Benefits and realistic limits
One of the clearest benefits of Iyengar yoga is improved body awareness. Detailed instructions help you distinguish stretching from collapsing, activation from gripping and stability from rigidity. This awareness can carry into daily life: how you stand, sit, walk, breathe and respond to effort.
Iyengar yoga may also improve mobility and stability. Because props allow the body to work within an appropriate range, you can explore movement without forcing yourself into a position too soon. In a forward fold, for example, placing the hands on blocks may keep the spine long and reduce strain in the lower back. In standing poses, using the wall can teach the legs to work while balance is still supported.
Mentally, the slower rhythm trains concentration. Holding a pose for 30 seconds, 1 minute or longer while observing clear actions gives the mind a precise task. You may focus on the heel, the outer hip, the length of the side ribs or the softness of the jaw. The point is not to empty the mind by force, but to direct attention steadily.
There are limits. Iyengar yoga is not a quick cure for pain and does not replace medical diagnosis, physiotherapy or psychological care. It can support recovery when adapted well, but a poorly chosen pose or a pose held too long can aggravate symptoms. Some people may also find the method too technical at first. If you mainly want continuous movement, sweat or spontaneity, Iyengar may feel demanding in a different way.
How to practise: a detailed sequence
This sequence takes about 45 to 55 minutes. You will need a mat, two blocks, a yoga belt or firm strap of about 2 metres, one or two folded blankets and a free wall. A stable chair and a bolster are useful but not essential. Keep one rule in mind: sensation may be clear and strong, but it should never be sharp, electric or associated with losing your breath.
1. Seated arrival — 4 minutes
Sit on a folded blanket with crossed legs, or extend the legs if the hips feel restricted. Elevating the pelvis helps the spine lengthen without rounding the lower back. Place the hands on the thighs and notice three things: the weight of the sitting bones, the length of the spine and the tone of the jaw. Breathe through the nose naturally for the first minute, then gently lengthen the exhalation.
2. Tadasana with a block — 4 minutes
Stand with the feet hip-width apart and place a block between the upper thighs on its narrow setting. Do not squeeze aggressively. Use the block to feel the legs gathering toward the midline. Spread the weight through the inner heel, outer heel, base of the big toe and base of the little toe. Lift the breastbone without pushing the ribs forward. Hold for 30 to 40 seconds, rest briefly and repeat 4 times.
3. Uttanasana with hands on blocks — 4 minutes
From standing, fold from the hips and place the hands on blocks at a height that lets the spine stay long. Bend the knees if the hamstrings are tight. The aim is not to touch the floor; it is to lengthen from the pelvis to the crown of the head. Hold for 45 seconds, come up with control and repeat 3 times.
4. Downward dog with support — 5 minutes
Place the hands on blocks or against the wall at hip height if the shoulders or back feel restricted. Step the feet back until there is a long line from the hands to the pelvis. Press the support away and move the thighs back. Hold for 30 seconds, rest in child’s pose with the forehead supported, and repeat 4 times. The support helps you learn the direction of the pose without collapsing the wrists, shoulders or lower back.
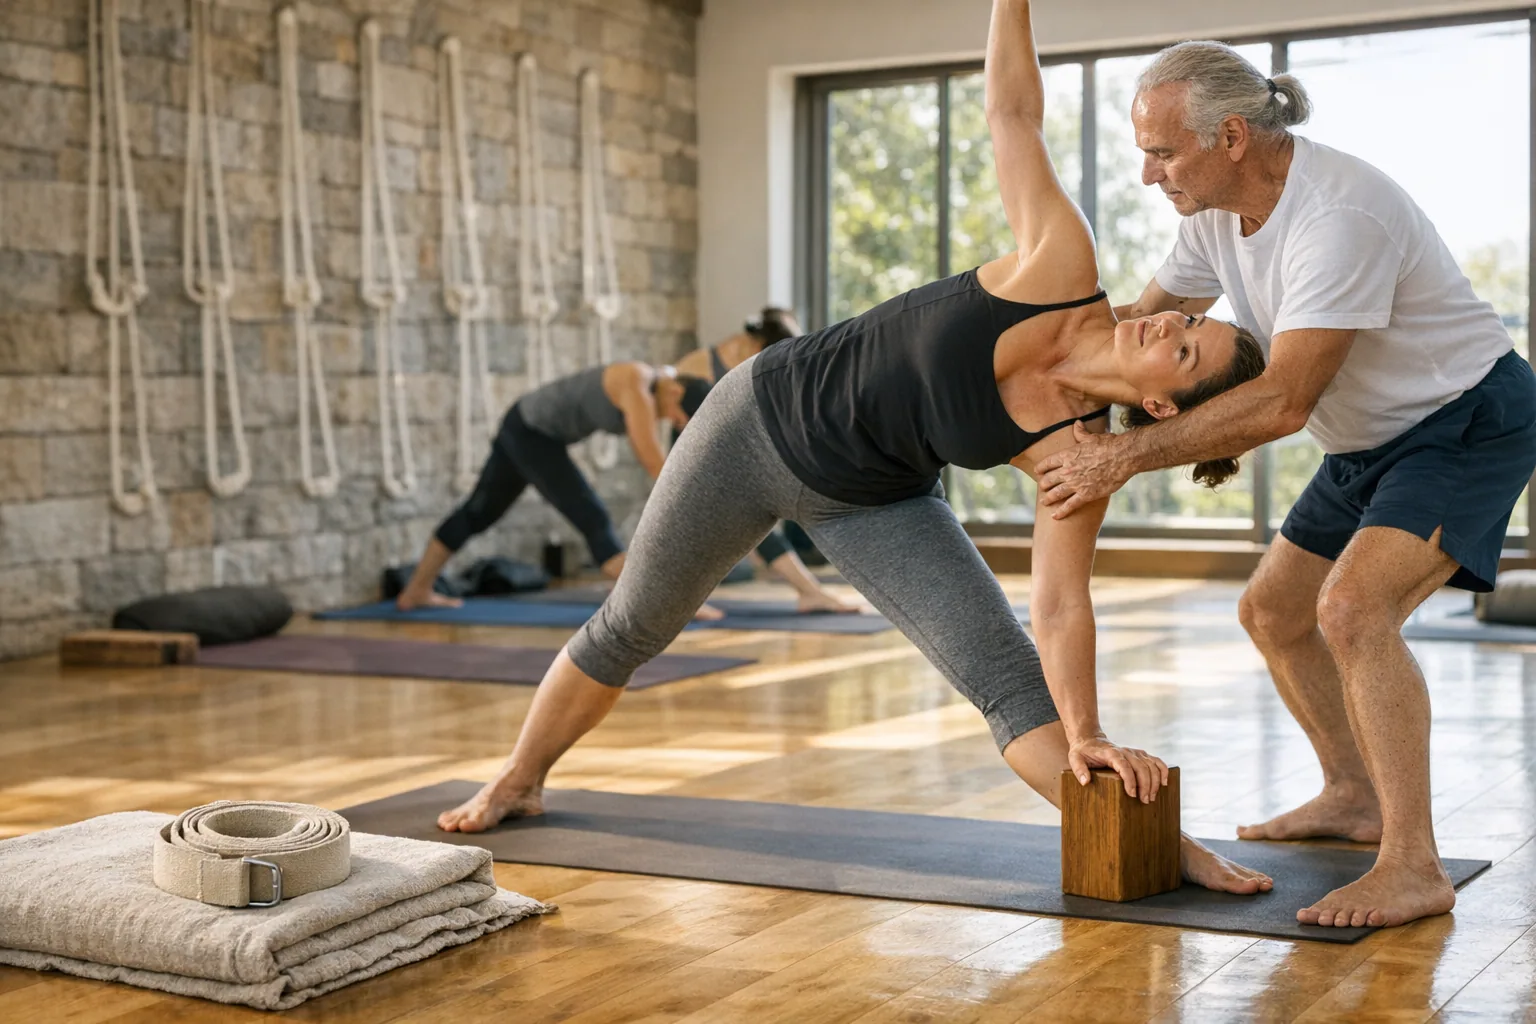
5. Utthita Trikonasana with a block — 8 minutes
Step the legs wide, turn the right foot out and place a block outside the right ankle. Extend the arms and move into the pose from the hip. Rest the lower hand on the block, but do not dump weight into it. Use it to lengthen both sides of the trunk. Hold 45 seconds on each side and repeat twice. If balance is difficult, practise with the back near a wall.
6. Virabhadrasana II — 6 minutes
From a wide stance, turn the right foot out and bend the right knee so it points toward the second and third toes. You do not need a 90-degree angle if that compresses the hip or ankle. Extend the arms, soften the shoulders and keep the gaze steady. Hold 30 to 40 seconds per side for 2 rounds. If the front knee falls inward, reduce the bend or use the wall for feedback.
7. Supta Padangusthasana with a belt — 8 minutes
Lie on your back and place the belt around the sole of the right foot. Extend the leg upward without locking the knee, while keeping the left leg active on the floor. If the pelvis lifts or the back rounds, lower the raised leg slightly. Hold 1 minute per side. Then open the leg to the side, supporting the thigh with a block or cushion if needed, and hold 45 seconds per side.
8. Supported Setu Bandha — 6 minutes
Place a block under the sacrum, not under the lumbar spine, and keep the feet hip-width apart. Choose the low or medium height. Let the chest open without forcing the ribs upward. Stay for 2 to 3 minutes if comfortable, then lower the pelvis and rest with the knees bent. Avoid this variation if it creates lower-back pressure or neck discomfort.
9. Viparita Karani at the wall — 5 minutes
Sit sideways near the wall and turn the body to take the legs up. The pelvis may stay slightly away from the wall; do not force the sitting bones to touch it. Support the head with a blanket if needed. Stay for 3 to 5 minutes with quiet breathing. Come out sooner if there is pressure in the eyes, dizziness or discomfort.
10. Savasana — 6 minutes
Lie on your back with a rolled blanket or bolster under the knees. Let the arms rest away from the body, palms facing up. Scan the feet, legs, pelvis, abdomen, chest, shoulders, neck and face. Do not control the breath. Let the body absorb the practice. In Iyengar yoga, rest is not decorative; it is part of the learning process.
Common beginner mistakes
The first mistake is believing props are only for inflexible people. In reality, advanced practitioners often use many props because they understand what action they want to study. A block does not simply make a pose easier; it brings the floor to a useful height. A belt does not remove work; it helps maintain a clearer relationship between limbs and spine.
Another common mistake is chasing the outer shape. In Triangle Pose, touching the floor may look successful, but if the spine rounds, the chest collapses and the breath becomes tense, the pose has lost quality. Iyengar practice values integrity over depth. The important question is not how far you go, but what becomes disorganized when you try to go further.
Beginners also tend to lock joints. Hyperextending knees or elbows may feel stable, but it often overloads ligaments. Think of activating without hardening: lift the kneecaps without pushing the knees back, extend the arms without sinking into the elbows and lengthen the spine without flaring the ribs.
A final mistake is holding poses too long out of pride. Staying is important, but it must be built gradually. If a pose is suggested for 1 minute and your breath is strained after 25 seconds, come out, rest and repeat for less time. Conscious repetition teaches more than endurance with a tight face.
Who it suits / contraindications
Iyengar yoga can suit beginners who want solid foundations, people with stiffness who need adaptations, practitioners of other styles who want better alignment and those who sit for long hours and need safe mobility work. It can also be useful for older adults when the class is adapted and props are used well. The pace gives time to observe, correct and progress without relying on speed.
It is especially helpful for people who fear not being able to do yoga poses. Props bring the pose closer to the real body, instead of forcing the body toward an ideal image. This does not mean the practice is always gentle. A well-taught standing sequence can be intense, but the intensity is organized.
Extra caution is needed with acute injury, sharp pain, symptomatic disc issues, recent surgery, vertigo, uncontrolled high blood pressure, glaucoma or cardiovascular conditions. Inversions, including milder versions such as legs up the wall, may not be suitable for everyone. During pregnancy, practice should be adapted by trimester and guided by a qualified teacher.
With osteoporosis, deep spinal flexion and sudden entries into poses should generally be avoided. With lower-back pain, not all backbends are helpful; some people benefit from support, while others are irritated by too much extension. If a pose increases symptoms, leaves residual pain or disturbs breathing, modify it or stop.
Suggested weekly routine
Three weekly sessions are enough to begin. Repeating basic actions with attention is more useful than accumulating hours. A balanced week can include one foundations session, one quieter supported session and one standing-pose session. On other days, add 8 to 12 minutes of Tadasana, Uttanasana with blocks and Supta Padangusthasana with a belt.
- Day 1: standing foundations, 40–50 minutes. Tadasana, Trikonasana, Virabhadrasana II, supported Prasarita Padottanasana and Savasana.
- Day 2: posterior-chain mobility and release, 30–40 minutes. Supported Downward Dog, Supta Padangusthasana, supported Setu Bandha and Viparita Karani if appropriate.
- Day 3: technique and staying, 45–55 minutes. Practise fewer poses, hold them with more observation and take clear rests.
- Optional daily practice, 8–12 minutes. One standing pose, one supported forward fold and a short rest.
For the first 4 weeks, avoid increasing duration and intensity at the same time. If you hold longer, reduce difficulty. If you introduce a new pose, hold it for less time. This simple progression helps prevent the common beginner problem of doing too much before sensitivity has developed.
FAQ
Do I need to buy all the props to start?
No. Two blocks, a belt and a firm blanket are enough for home practice. The wall is one of the best props and costs nothing. A stable chair can be useful, provided it does not slide. A bolster is helpful for restorative work, but it is not essential at the beginning.
Is Iyengar too slow if I like movement?
It may feel slow if you come from flowing styles, but slow does not mean easy. Holding a pose with precise actions for 45 or 60 seconds can be demanding. The slower pace also reveals habits that fast practice often hides.
Can I practise Iyengar at home without a teacher?
Yes, if you choose basic sequences and do not have significant injuries. Still, working with a trained teacher is valuable because small adjustments can change a pose completely. At home, use props generously and avoid complex inversions or long holds without guidance.
Do props slow down progress?
Not necessarily. Often they speed up learning by reducing compensation. Progress in Iyengar yoga is not only measured by going deeper, but by breathing better, holding with less tension and understanding what each part of the body is doing.
Closing
Iyengar yoga invites a mature kind of practice: unhurried, precise and free from performance. Props do not weaken the method; they make it more intelligent. They allow the pose to meet the body as it is today, and from there stability, mobility and calm can develop.
The precision of this style should not become perfectionism. Its real value lies in learning the difference between useful effort and unnecessary tension, between intensity and aggression, between progressing and pushing. With that attitude, a simple practice using blocks, a belt, a blanket and a wall can become a complete laboratory for understanding and caring for your body.
Ready for your next retreat?
Explore hundreds of retreats across Spain with transparent pricing.
Explore retreats